Company Setup & Onboarding
Learn how to sign in with mobile OTP verification, complete the Setup Wizard, configure regional currencies, and manage multiple company files.
Learning Objectives
By the end of this guide, you will:
- Sign in securely using your mobile phone number and WhatsApp OTP verification.
- Navigate the Choose a Company screen to create, open, or restore company databases.
- Complete the 4-step Setup Wizard to initialize a clean business accounting profile.
- Select the appropriate Regional Chart of Accounts preset (e.g. Pakistan FBR/PRA/SRB or International).
- Switch between multiple company files in two clicks.
Sign In & Mobile Verification
Roznamcha Digital secures your account using your mobile phone number. This links your cloud backups directly to your verified WhatsApp identity without requiring complex email passwords.
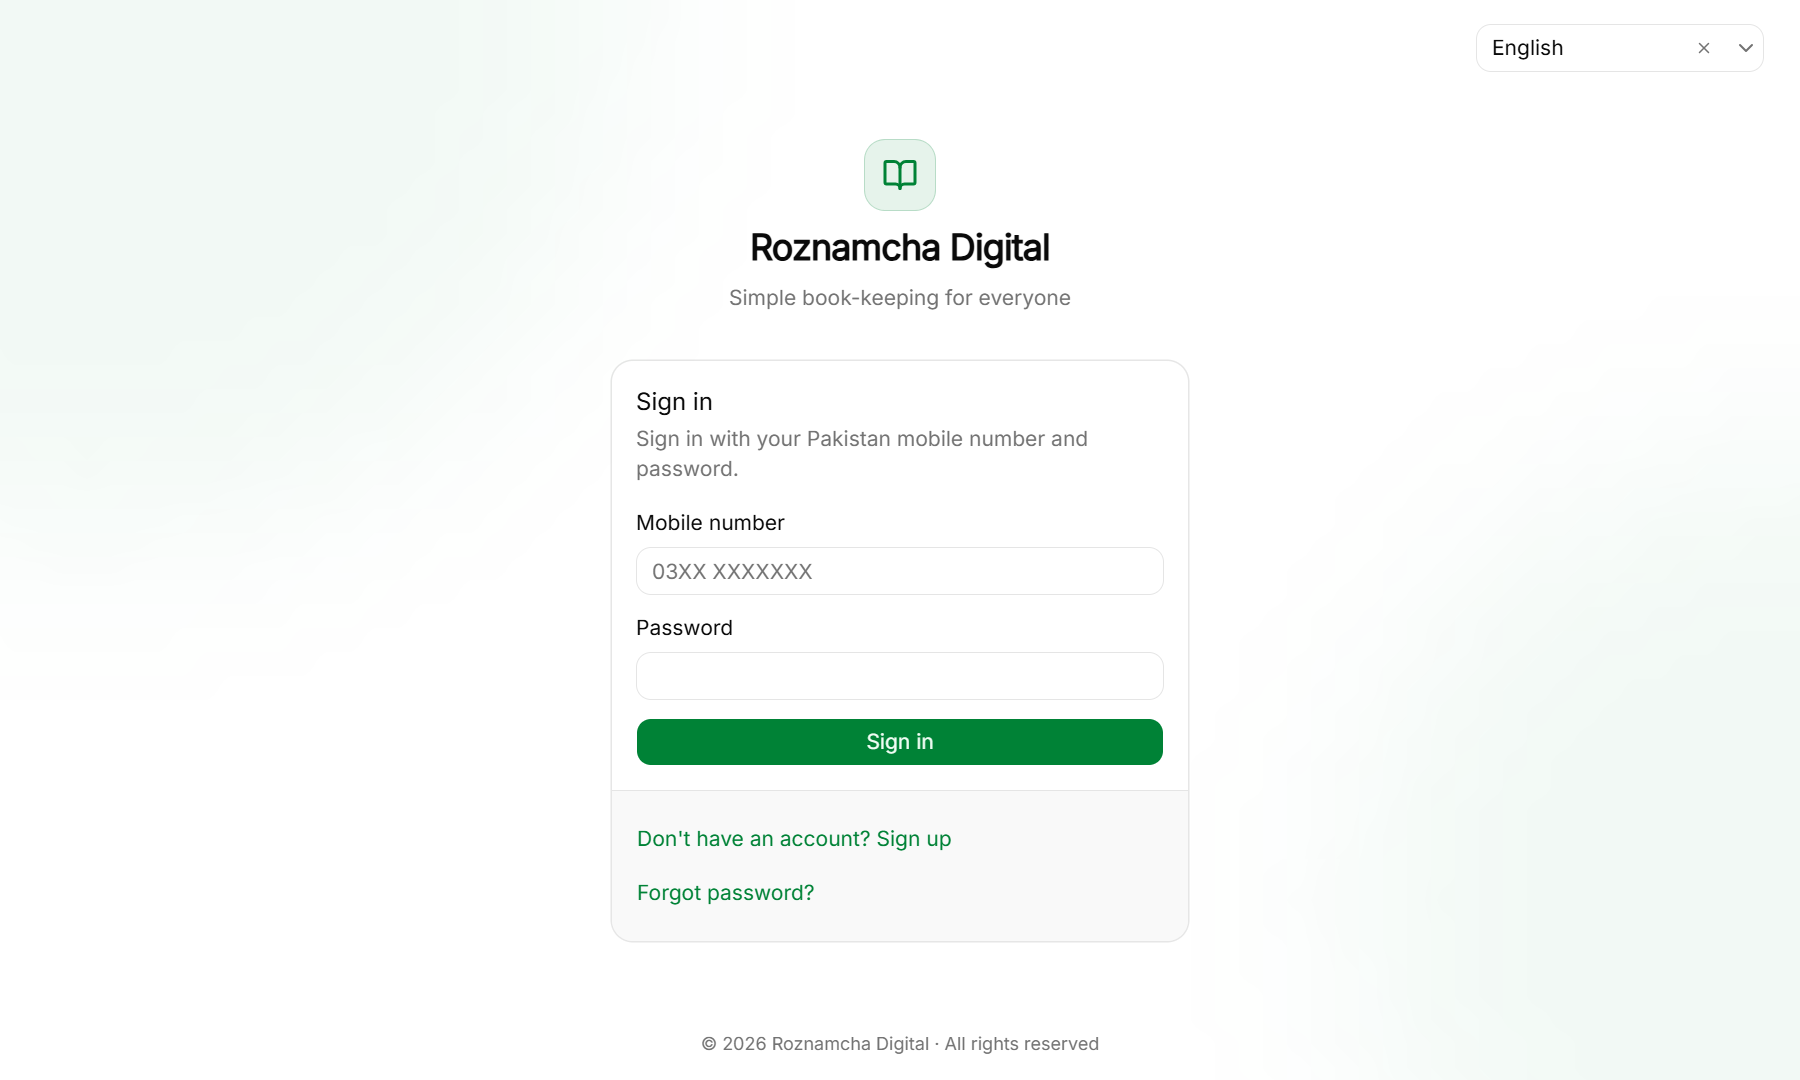
Steps to Sign In or Sign Up:
- Launch Roznamcha Digital.
- First-Time Users: Click Sign up, enter your mobile number with country code (e.g.,
+92 300 1234567), and click Send WhatsApp OTP. - Check WhatsApp on your phone for the 6-digit verification code.
- Enter the verification code, create a strong master password, and click Verify & Continue.
- Existing Users: Enter your mobile number and password to log in. Use Forgot password? to reset your credentials via WhatsApp OTP at any time.
The Company Chooser Screen
After signing in, you land on the Choose a Company screen:
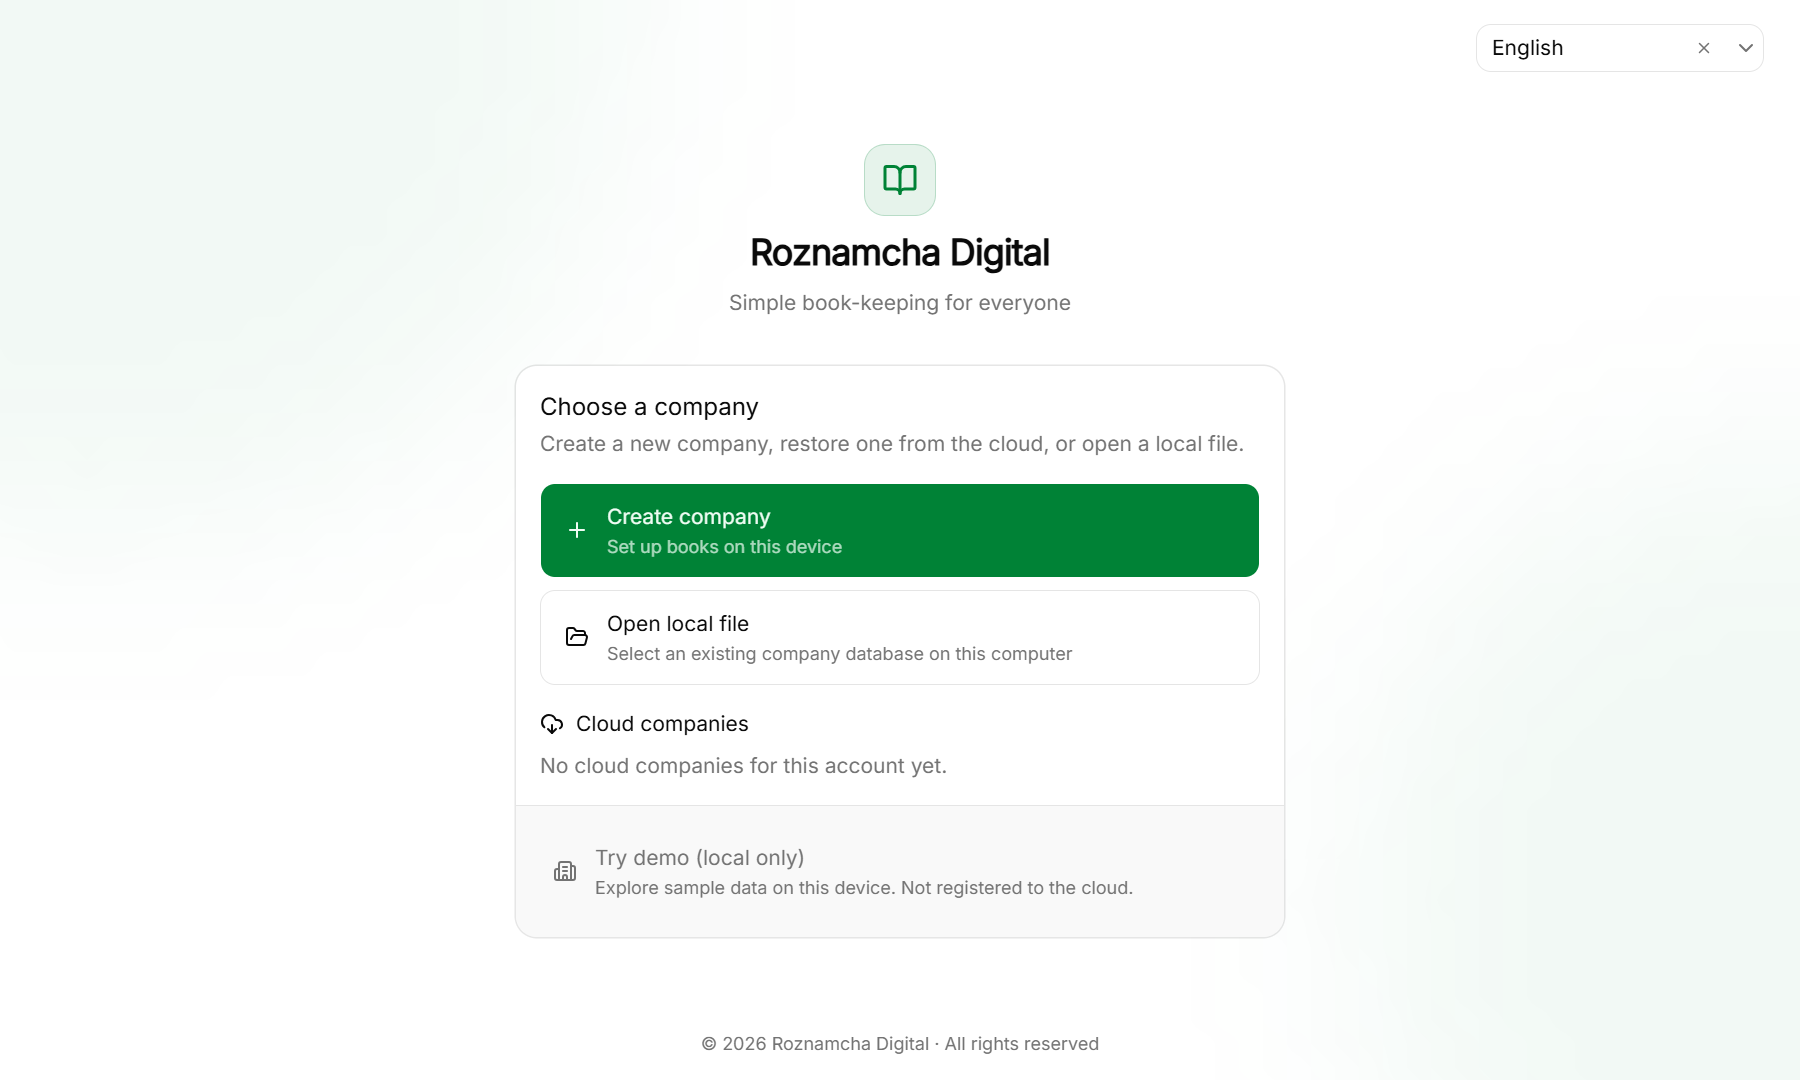
From this screen, you can:
- Create Company: Launch the Setup Wizard to initialize fresh accounting books for a new business.
- Open Local File: Select an existing company
.dbfile stored on your computer or USB drive. - Cloud Companies: Restore and open companies synced with your cloud account.
- Try Demo (Local Only): Explore Roznamcha Digital with preloaded sample products, customers, and invoices.
The 4-Step Setup Wizard Walkthrough
When creating a new company, a 4-step wizard configures your business defaults:
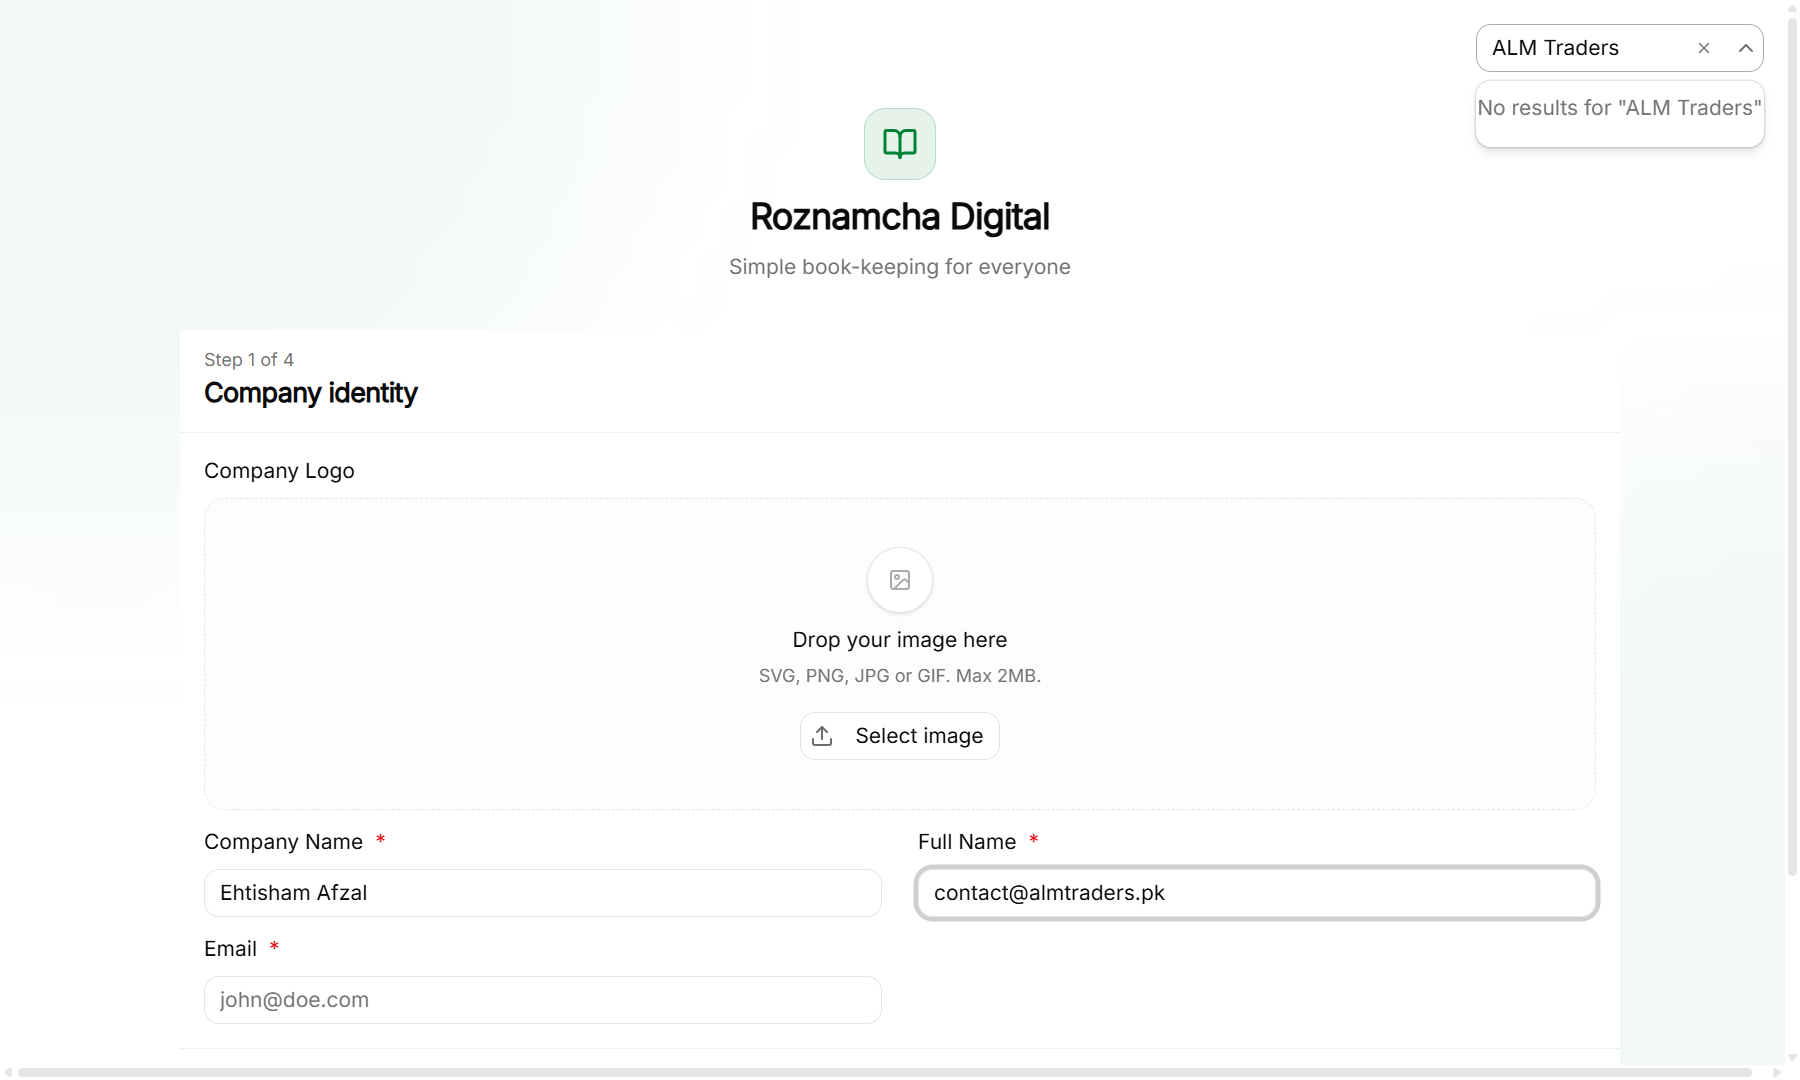
Step 1: Company Identity & Currency
- Company Name: Your official registered business name (e.g. Al-Rehman Electronics & Trade). This appears on all printed invoices, quotations, and official reports.
- Abbreviation: A short 3–5 letter prefix (e.g.
ARET) used when generating auto-numbering series for invoices and accounts. - Base Currency: The currency in which your General Ledger and Balance Sheet will be calculated (
PKR,USD,AED,EUR,SAR,GBP). - Fiscal Year Range: The official tax year for your business (e.g., July 1 to June 30 in Pakistan, or January 1 to December 31 in standard calendar years).
Step 2: Regional Accounting & Tax Framework
Roznamcha Digital automatically loads the appropriate Chart of Accounts and Tax Framework based on your selected country:
- Pakistan Preset: Pre-configures standard FBR Sales Tax (18%), Provincial Services Sales Tax (PRA 16%, SRB 13%, KPRA 15%, BRA 15%), and Withholding Tax deduction accounts.
- International / Standard Preset: Configures standard Output VAT, Input VAT recoverable, and generic trade sales/expense groups.
Step 3: Default Bank & Cash Accounts
- Enter your main business bank name (e.g., Meezan Bank Current A/C or HBL Operating A/C) and opening Cash in Hand drawer name.
- Roznamcha Digital automatically links these to your Bank and Cash Accounts ledger group.
Step 4: Company Logo & Contact Details
- Upload your high-resolution company logo (
.pngor.jpg). - Enter your business address, phone number, email, and tax registration number (e.g., NTN / STRN / TRN / GSTIN).
- Click Finish Setup. Roznamcha Digital initializes the local database file in under 2 seconds.
Account Profile & Cloud Settings
Manage your user profile and cloud backup preferences in the Account Settings panel:
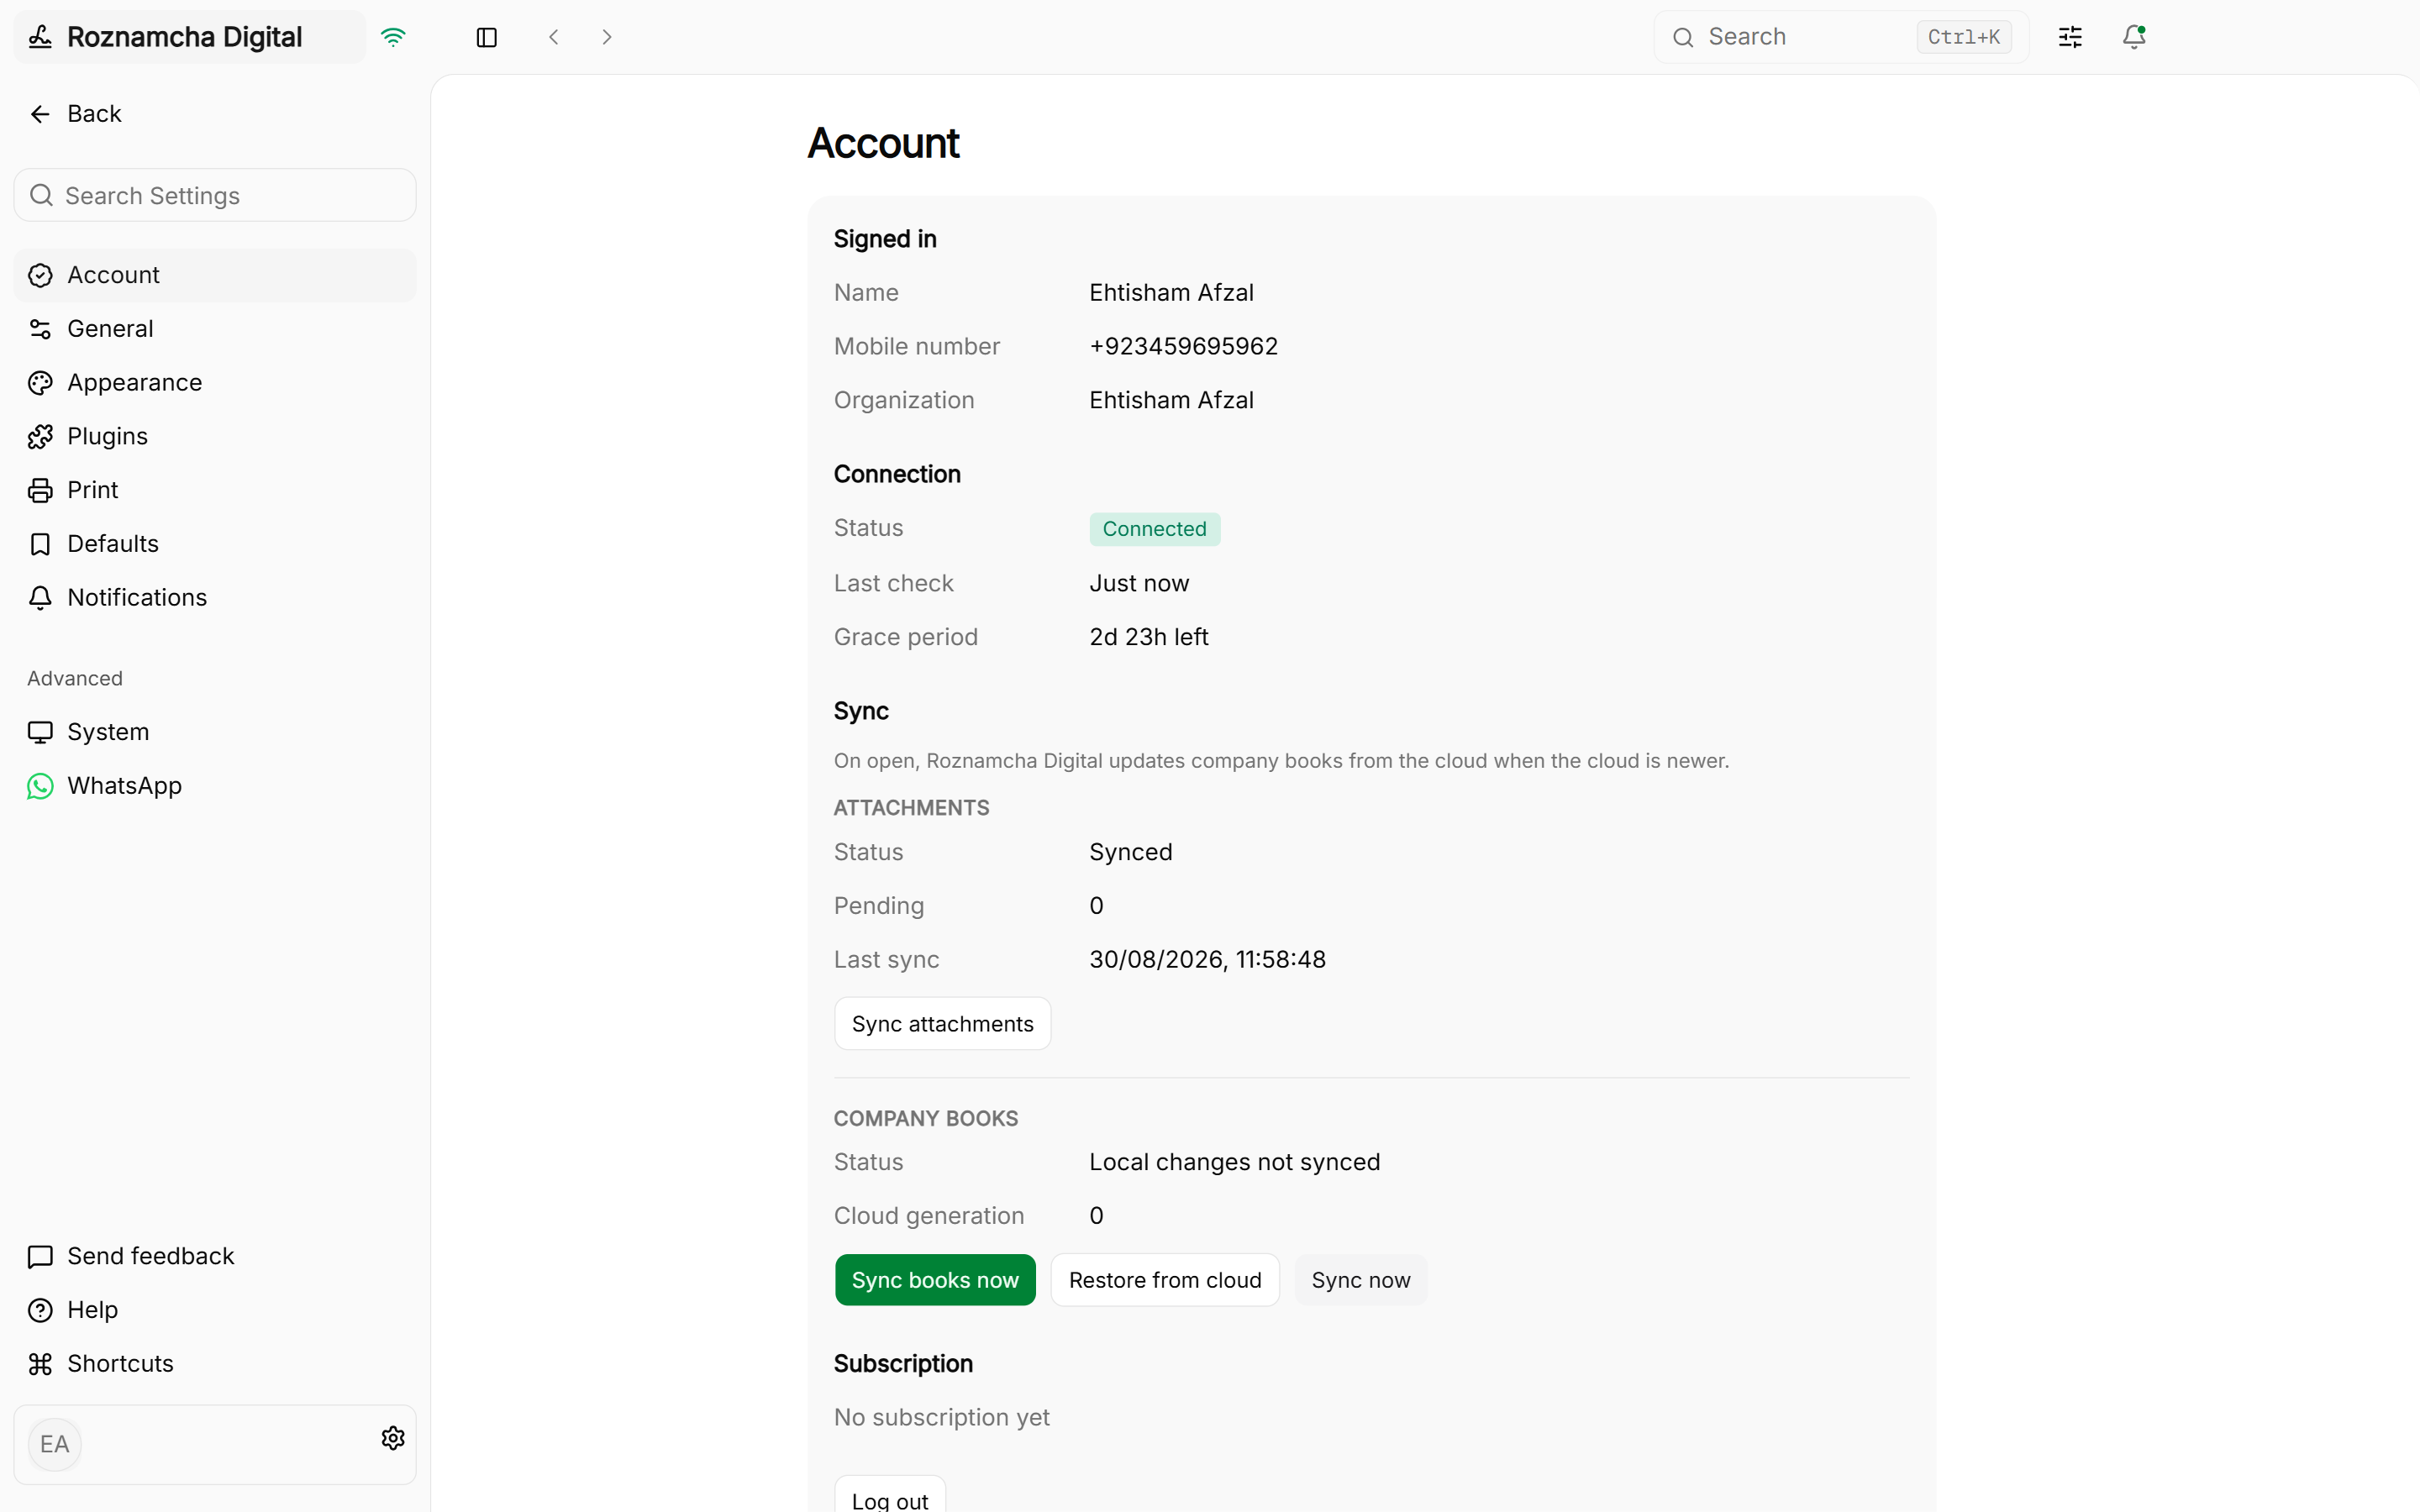
- User Profile: Update your display name, business email, and notification preferences.
- Device Security: Review active devices authorized to access your company database.
- Cloud Backup Status: Verify the timestamp of the latest automated cloud snapshot.
Multi-Company Management
Need to manage separate accounts for multiple branches, sister companies, or different business ventures? Roznamcha Digital supports unlimited independent company files.
Switching Companies in 2 Clicks:
- Click the Active Company Name in the top navigation bar.
- Select Switch Company from the dropdown menu.
- Click on the desired company from your saved list. The workspace switches instantly without restarting the application.
Creating an Additional Company:
- From the Company Chooser screen, click + Add New Company.
- Select Create Company to run the Setup Wizard for your new venture, or select Open Local File if you are loading a
.dbfile shared from your accountant.
Real-World Scenario: Setting up a Dual-Entity Business
Scenario: Bilal operates two businesses: a retail boutique in Islamabad and a textile wholesale warehouse in Faisalabad. He wants completely separated financial ledgers and different invoice series.
- Action: Bilal runs the Setup Wizard for Company 1: “Bilal Fashion Boutique” with currency PKR and POS retail templates enabled. Next, he adds Company 2: “Bilal Textile Mills” with wholesale item series and multiple warehouse tracking.
- Result: Both companies remain completely isolated with their own local files and separate automated cloud backup versions.
Common Pitfalls & Best Practices
Double-Check Base Currency Before Posting Transactions: Once you post your first transaction, the Base Currency cannot be changed, because all historical ledger entries are valued in that currency.
Set Accurate Tax Registration Numbers in Company Profile: Ensure your NTN / STRN / TRN is entered in Settings > Company. This automatically injects compliant tax identifiers into your invoice print templates.
Knowledge Check
Foundations & Interface Mastery
Master the desktop interface, executive dashboard KPI analytics, global quick search palette, and keyboard navigation shortcuts.
Double-Entry Bookkeeping & Chart of Accounts Architecture
Master the 5 root account types, double-entry debit and credit rules, tree hierarchy, and custom ledger configuration in Roznamcha Digital.